Sewing

1920s Heiress

My recent obsession with Miss Fisher’s Murder Mysteries reminded me of one of my first forays into writing about sewing. I thought I would resurrect and update that article for my blog. The connection is because Phryne Fisher, the 1920s feminist protagonist, has the most enviable collection of nightwear.

Back in May 2019, Sew Hayley Jane asked me if I would like to be “Make of the Month”. Hayley includes a magazine in her sewing subscription boxes and her offer made me so proud (I phoned my Mum to tell her).

It often starts with the fabric…

Hayley’s February 2019 box included some dreamy Atelier Brunette Moonstone viscose in a blush pink, which was crying out to be made into something luxurious. When I received the fabric, I committed to making something immediately (after mandatory pre-wash) for fear of it sitting in my stash and being “too precious” to use. Typically, AB fabric is at the pricier end of the scale, but I’ve found the quality to be good to counteract the hit on the bank balance.

I had the Seamwork Almada pattern in my stash and decided that elegant loungewear was the way to go. At the time, we had been re-watching Agatha Christie’s Poirot and I fancied myself as some sort of 1920s heiress, swishing around and drinking cocktails…but without the crime. Now when I’m wearing it, I’m Phryne…minus the bodies.

Using selvedge as a label is one of my favourite touches

Adjustments

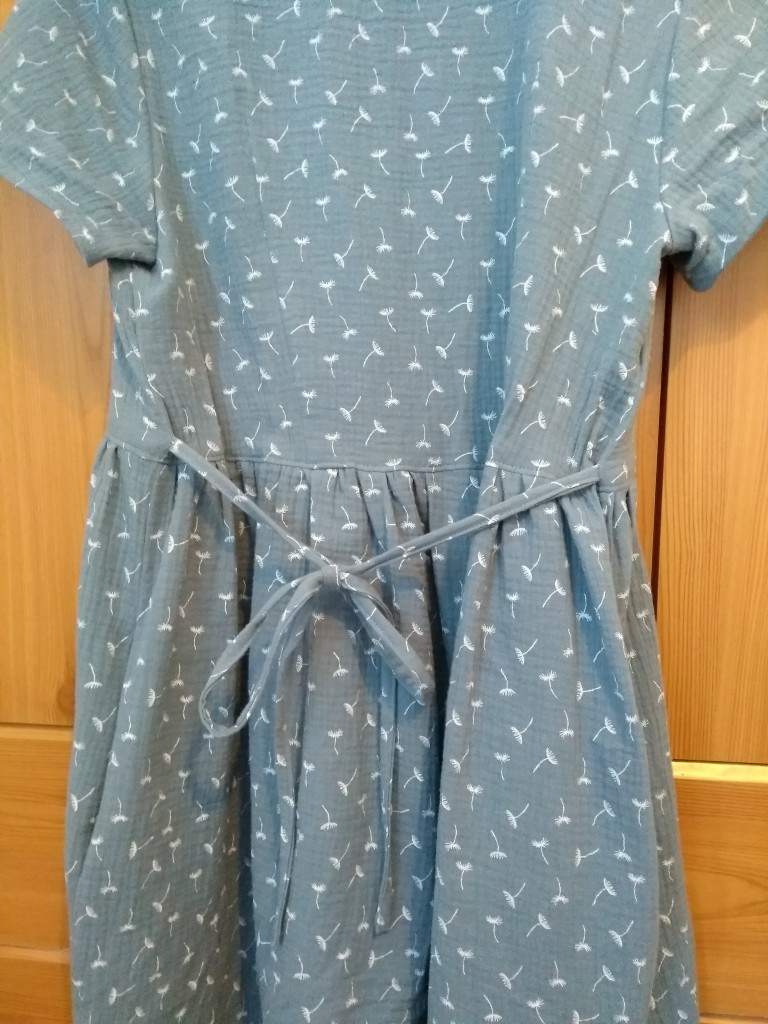
Quite a few reviews of the Almada said that the robe comes up short so I cut the robe at the longest pattern length, which was approximately 4″ extra. The tie placement was trial and error, figuring out what was practical and comfortable. I ended up moving the ties “up and in a bit” from the original pattern placement.

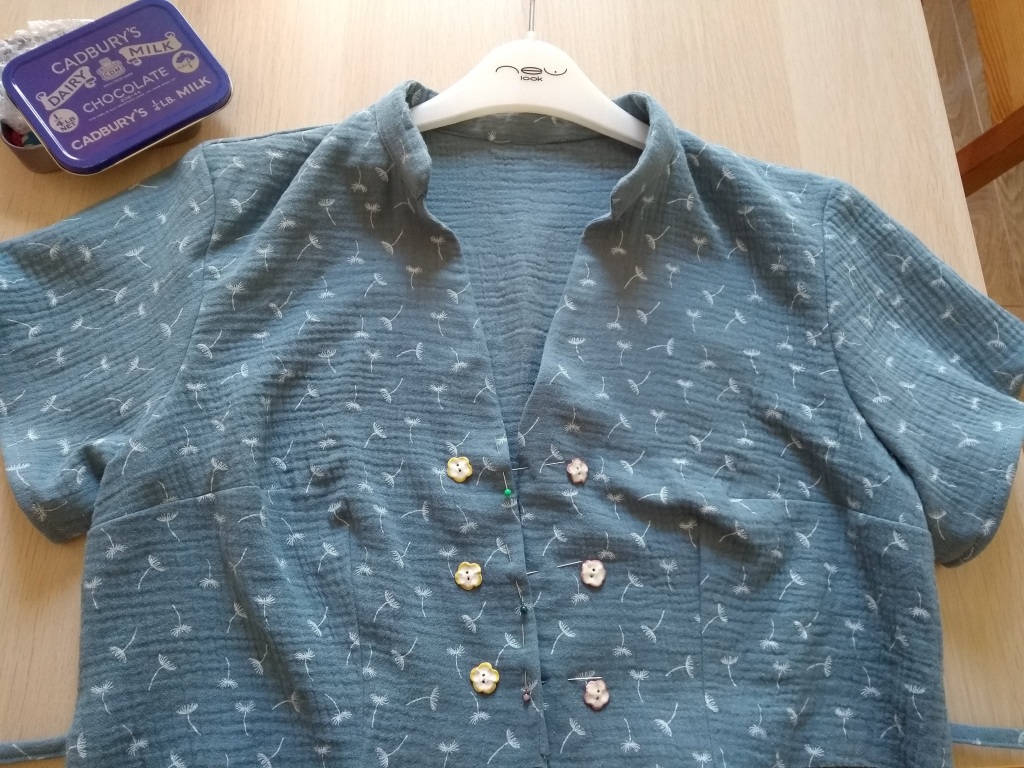
The fabric was a dream to work with. I decided to sew French seams throughout to compliment the overall look. I confess that I bought the bias binding used for the neckline – life is too short to fiddle about creating your own when Atelier Brunette have done the work for you. Through a stroke of luck, I had enough bias binding for the hem as well. Whilst not in the instructions, I think it looks nice alongside the French seams.

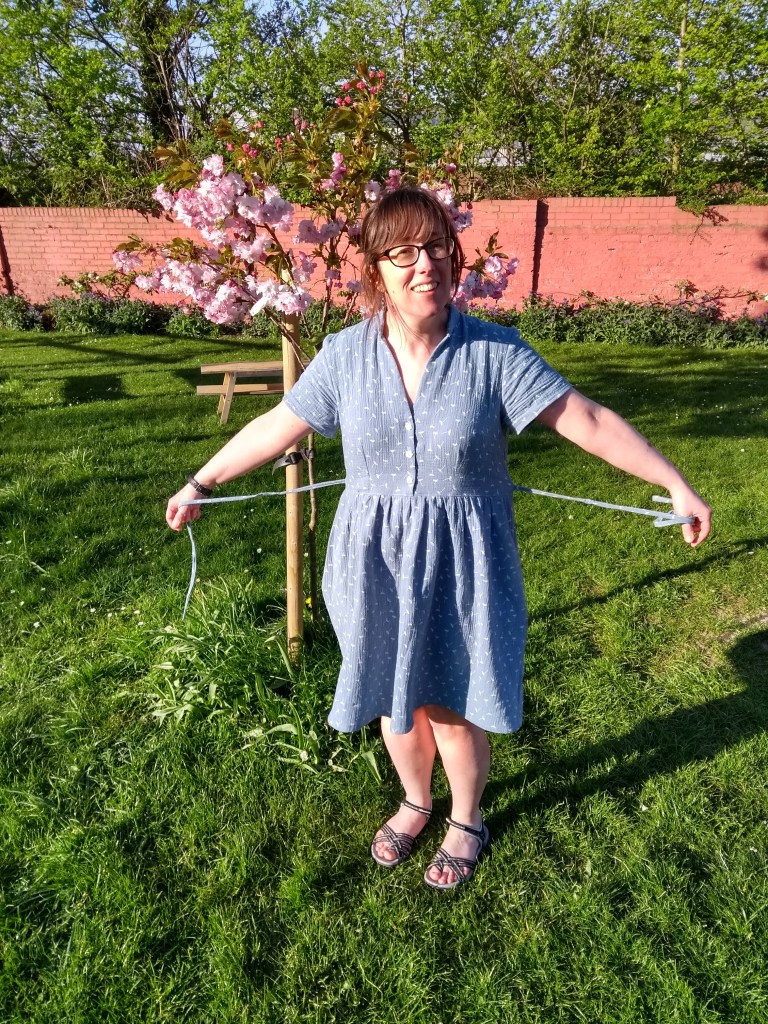
As you can see from my expression, I’m not destined for a career as a boudoir model but I do love swishing around the house in my Almada. I get so much wear out of it as it’s a perfect summer robe. As with most of the reviews that I read, I have noticed that the sleeves frequently get stuck on door knobs but it makes me move slower so that’s probably a good thing.

Thanks for reading. If anybody needs me, I’ll be having a cocktail whilst watching Miss Fisher and Jack solve murders ;o)

MakeNine2020 · Sewing

Isewlation part 3 – frocks

I’m back for part 3 of isewlation sewing with some dresses that I’ve conjured up.

Most summers, I wear a lot of dresses and prefer a slightly more fitted look for work. Due to the “pesky virus” (I’m going through a phase where I refuse to use its name), I have had less/no need/desire to wear them this year. They’ll keep for future years but I’m sad that I haven’t worn a lot of my wardrobe this summer.

Lilac Kew

Early on in lockdown, I made a Kew dress with this lilac broderie anglaise from Lamazi Fabrics. I had made the Kew before and love the fit, especially the high/low hem on the skirt. By nature, broderie anglaise has holes in it so I fully lined this dress with a thin cotton that I dyed in the machine.

I wore the dress for a virtual murder mystery night with my family where I played a debutante (hence the pearls). I was ridiculously excited to wear heels and get dressed up that evening!

Return of the Myosotis

Who’d have thought I had reservations about the Myosotis dress to begin with?! Since I made my first one (blogged here), I have made two more.

Having dipped my toe into the ‘double-gauze water’, I decided to use another of my Make Nine 2020 fabrics for a second Myosotis dress. This teal and gold dots fabric was from Sew Me Sunshine a while ago and has such a rich colour. The buttons were from my stash and I think were cut off an old ‘rtw’ garment. I made the entire dress during The Fold Line’s #sewingweekender, which was a fun few days of sewing as a global community.

For my third Myosotis, I wanted a longer version. Another of my Make Nine fabrics was from Crafty Sew & So, an abstract floral viscose that I have always wanted to make into a floaty dress. It didn’t disappoint. I cut version B of the dress before the bottom panel to make sure I had enough to make a complete garment. Then for the bottom panel, I cut as long as the remaining fabric would allow and gathered it before attaching. The teeny, tiny glass buttons are from the rabbit hole that is The Swagmans Daughter.

Park Lane

I won the Park Lane pattern from RedWSews as she had an extra copy following a pattern test. I really liked the style of the dress and was eyeing it up before winning it. I used a drapey viscose that I got in a Sew Hayley Jane box.

I made a few fitting alterations on this dress but the main alteration was to add an elastic channel in the cuff. When I tried it on, it was really floppy around my elbow, which I decided would annoy me. I was pleased with how the cuffs had turned out though so didn’t want to shorten and resew them! The lazy woman’s choice resulted in a sleeve that I probably prefer. I unpicked a few inches, then fed some elastic through to tighten up the cuff.  I’ve since made the blouse version and kept this alteration.

If I make this dress again, I’ll also probably put the zip in the back. Whilst the side zip is more discrete, it made for a bit of a nightmare when I needed to grade the dress in by a few inches. To do this symmetrically, I had to taper the back. It worked but would have been easier if the zip had been down the centre back.

The photos of this dress offer some “lockdown realness”.  The weather is awful today and I wanted some photos so I asked the husband to take some.  He asked “are you leaving those socks on?”, to which I said “yeah, why not?”! It’s a lovely dress to wear and feels a bit special on grey days.

Thanks for reading :o)

MakeNine2020 · Sewing

Mouse’s Ear

Do you ever see a popular pattern and think “meh, not for me”? The Myosotis dress from Deer & Doe was that pattern for me. I couldn’t even say or spell it! On researching for this blog, I learnt that Myosotis comes from the Ancient Greek for “mouse’s ear” so it feels more appropriate that I’ve fallen in love with the pattern, given my nickname.

I felt like there was too much going on for me and wondered if all that ruffle, flounce and gathering would swamp my small frame. What I hadn’t realised was there was another, less ruffly version.

Given my apathy towards this pattern, how did I come to own it? My whole dress is a combination of goodies from the mind of Sew Hayley Jane. The pattern, fabric and buttons are all from boxes that I had purchased from Hayley over the past year or so.

When I got the Myosotis, I was slightly more interested when I saw the line drawing of the simpler version and had a more detailed look at the hashtag. In the back of my mind, I thought that waist ties might make it a dress that I would be more comfortable with. It had a collar though and I wasn’t ready for that level of complication in my life! And so, it went into my stash and was forgotten for a while.

Fabric

Make Nine 2020 was the reminder that I needed to release it from the archives. Whilst perusing my fabric stash, I came across a double-gauze with dandelions on it and wondered if it would make a good Myosotis. Spoiler alert: it did. By coincidence, this was also from one of Hayley’s boxes.

I hadn’t made anything with double gauze before. It’s light, soft and I enjoyed sewing with it. I had seen posts online about double gauze misbehaving during sewing, but I didn’t experience that at all.

Hacking some waist ties

I had my mind set on additional waist ties to cinch the dress in. Rather than look up a tutorial online, I decided to “wing it”, which is a very rare approach for me. I cut two rectangles of fabric and folded them in on themselves then stitched closed (sort of like bias binding). As I predicted I would, I forgot to secure them into the bodice, so ended unpicking a bit of the sides to add them in! The waist ties allow me to pull the dress in at the waist a bit, which I prefer as a silhouette than it hanging loose.

I cut a size 38 on the collar and bust, then graded to a 40 on the waist and hip. I shortened the skirt by about an inch and did a full bicep adjustment to give myself a bit more space on the arm.

Buttons

These buttons are from Whim Wham Buttons and I think they’re called “Joy”. I was undecided on whether to use the pink or yellow ones and even did an Instagram poll (my followers couldn’t make their mind up either). In the end I went with yellow, partly because my husband preferred them and partly because the yellow were from a SHJ box, whereas the pink weren’t!

Verdict

I’ve badged this as a ‘surprising make’ as love it and wasn’t sure through the whole sewing process. I definitely prefer the simpler version and added waist ties. It’s so comfortable to wear that I’m considering another one in the other double-gauze that I have in my stash and Make Nine!

Thanks for reading :o)

MakeNine2020 · Sewing

Liquid Gold Kew

When I opened my Sew Hayley Jane box in December, I actually cooed. It contained this silky, velvety, shimmery gold viscose that I stroked for about 5 mins before even taking it out of the box. It is so light and drapes amazingly well. I knew fairly quickly what is was destined to be.

Some friends of ours got married this month and I knew that I wanted to make something with long sleeves for a winter wedding. I made Nina Lee’s Kew dress in summer 2019 and love the shape and fit. I have also made the Sewaholic Nicola dress twice, which comes with a long sleeve version. The Nicola has a part-elasticated waist, which I didn’t think this fabric would appreciate so I decided to combine Kew version A with the long sleeve from Nicola.

This photo really captures how the light reflects off the fabric in such a scrummy way

Hacking a sleeve pattern piece together

The sleeves took some patience but I’m really pleased that I persevered.

I started with the Nicola sleeve as a base, adjusted the arm scythe to match the Kew and did a full bicep adjustment. I also added some volume in the shoulder – I do love a puffed shoulder. After sewing what I would consider two near-perfect cuffs, I tacked the sleeves to the bodice and discovered the full bicep adjustment wasn’t enough and it was too tight…so the whole thing went on the ‘chair of shame’ for two days (sort of like the naughty step for WIPs).

Refreshed and ready to show the sleeves who was boss, I took the already adjusted sleeve pattern (thank goodness I trace!) and added more volume to the bicep and shoulder then made a toile before committing to the gold fabric again. One of the most frustrating things is that I had measured the original hacked pattern piece and it should have been fine. Anyway, live and learn!

This time it fit and I breathed a sigh of relief. If it had still been too small, I would have had to re-think the whole dress as I didn’t have enough fabric for a third set of sleeves.

In progress shot of the bodice

Sewing with liquid gold

Quite quickly, I named this fabric “liquid gold” because it was soooooo slippery. It required lots of clips and fine pins to keep it together. I think the fabric moved when I was cutting it as the bust fit is closer than the cotton-sateen Kew that I made in the summer (which still fits). There was a scary moment when I thought it wasn’t going to fit – I had spent so much time focusing on the sleeves that I didn’t really try it on with a view to actually closing the bodice. I had used the same bodice pieces as my previous dress, so why wouldn’t it?!

I had decided against using spray starch as I’ve tried it in the past and didn’t like it. Plus, I didn’t want to risk staining the fabric as it’s so delicate. I think the lesson I’ve learnt it to check the fabric pieces against the pattern before committing to sewing.

Fine pins and clips were required

As it was a special dress, I spent a lot of time on the details. I used French seams throughout, which have the added benefit of extra strength with a fine fabric. I think that it also looks nicer on a dipped hem, which the dress has. I often opt for self-covered buttons – this approach means I can dig out my old compass from school to draw all the circles! (Nerdy and proud) I know that some people loathe hand-sewing but I find it quite meditative to sit and sew buttons or a hem for an hour or so…which is fortunate because this dress had 17 buttons to attach and a lot of hem!

My final thoughts on this dress are that I loved wearing it. It was comfortable but I felt glamorous in it. There were a few nerve-wracking moments with the fit and trying to create a sleeve from two patterns and a vague idea, but it turned out remarkably close to the image in my head.

This fabric is also the first of my 2020 Make Nine. My only regret is that I didn’t get any decent photos of myself in the dress – this rather fuzzy one doesn’t really do it justice. I wanted to get a better photo but the storms in the UK mean I haven’t been outside much!

This is the only photo I have of me wearing the dress
(Elton overseeing proceedings)

Thanks for reading :o)