Sewing

Flat-pack sewing

In January, my eternal quest for warmth led me on a hunt for some sweatshirting to make myself some jogging bottoms (aka “joggers”). For transparency, I should say that these joggers will never be used for jogging! I fell down a research rabbit hole, looking at the history of jogging bottoms. These comfy trousers were invented in the 1920s and were meant to be “deal for your athletic needs”. 100 years later, I put it to you that they are ideal for all my lounging needs!
Lucky shopping

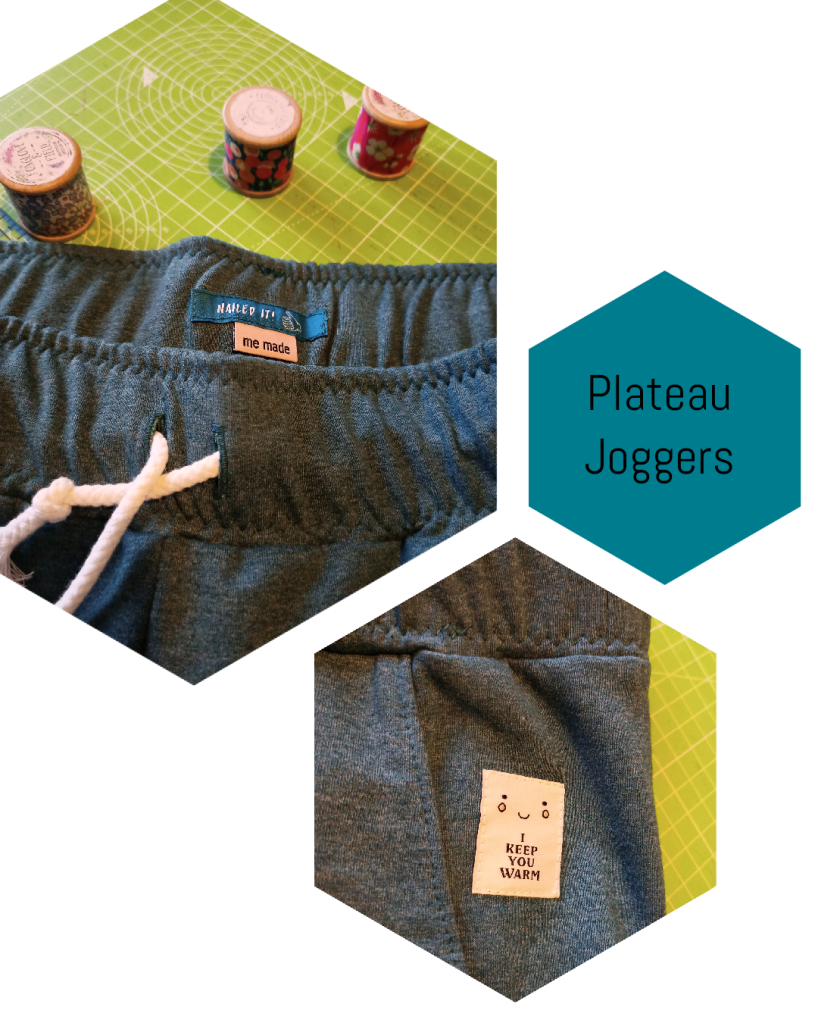
Initially I only wanted fabric but I quickly fell upon the Plateau joggers kit in the Guthrie Ghani January sale. This “flat-pack” sewing approach comes with everything needed to make a garment – fabric, notions and pattern. Knowing that the Emerson kit I bought in the summer was such an enjoyable experience, I clicked for more information.

The fabric was exactly what I had been on the hunt for, plus the sale price of the kit meant that the patterns and notions were practically free. This teal fleece-backed sweatshirting is so snuggly and soft – perfect for slouching around the house and doing Pilates.
Happy accident

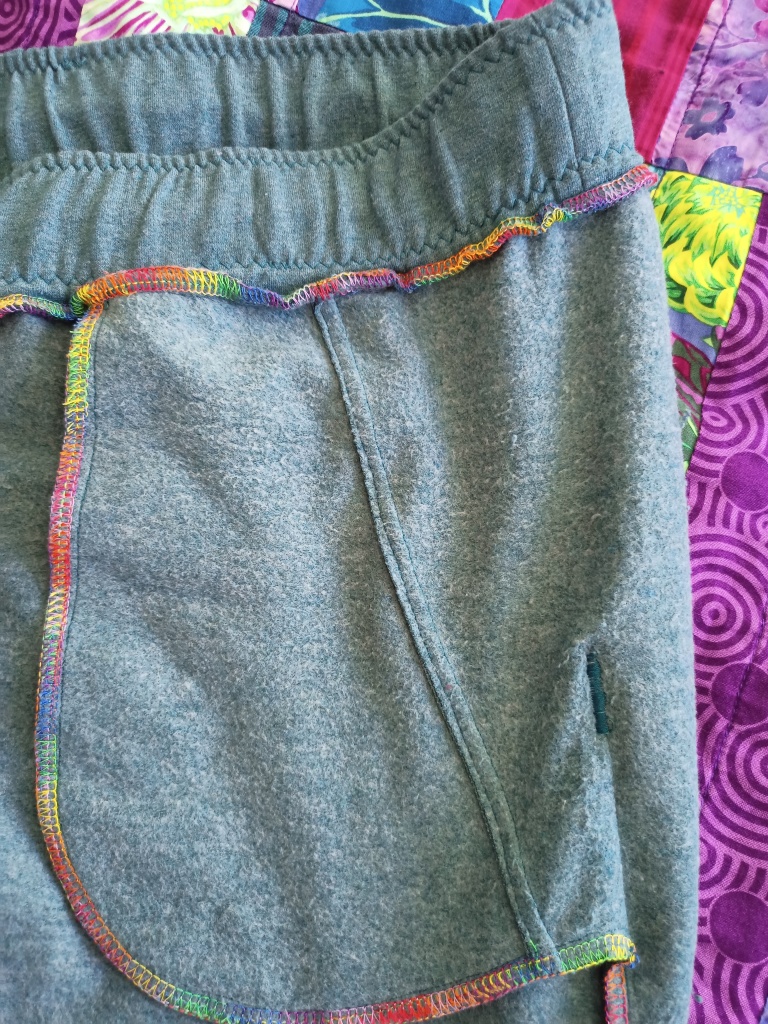
I intended to make the elasticated cuff version but it didn’t quite go to plan.   The pattern says it is drafted for somebody who is 5’6″, so I dutifully shortened the pieces by 2″.  I’m 5’2″, but erred on the side of caution…thankfully.

Whilst sewing, I realised that the joggers came up much shorter than I wanted.  I like the legs to finish around my ankles with a bit left over. Confused, I looked at the photos of the pattern online and realised the joggers are supposed to be cropped but this wasn’t clear from the illustration on the pattern. I dug the remnants out and cut two fabric cuffs – a lesson in always keeping remnants for emergencies and mending!  In the end, fabric cuffs made them the perfect length and meant I didn’t need to feed elastic through channels, so it worked out.  Phew.
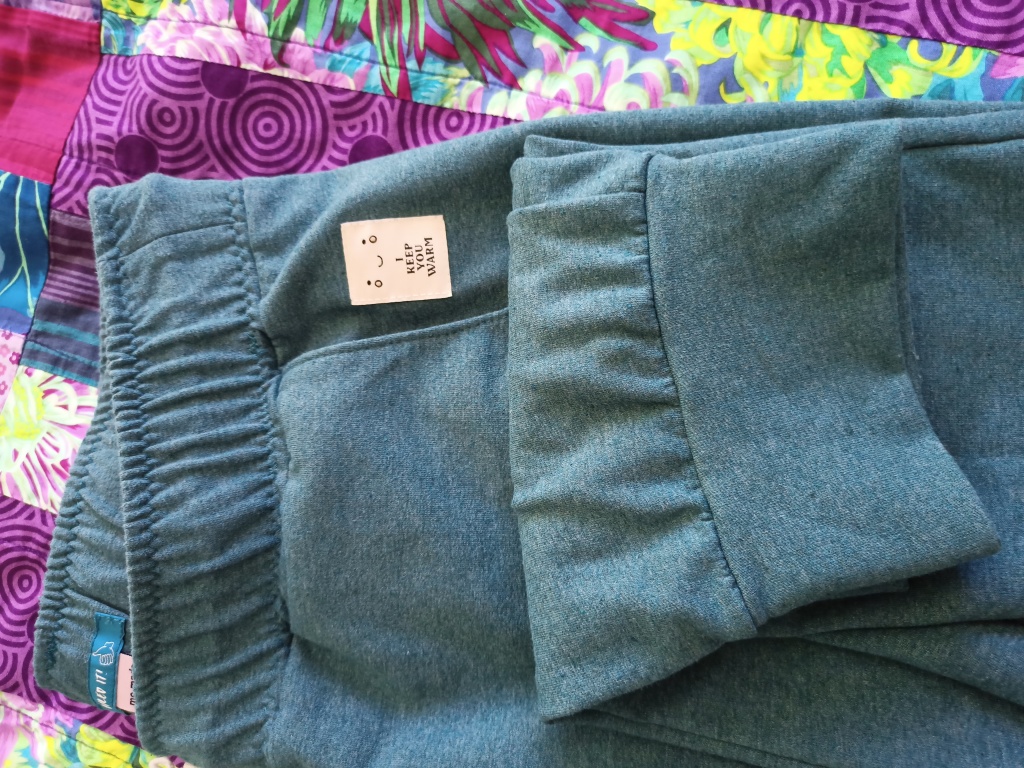
I found the construction of pockets really interesting, making these joggers more than “your average trouser” construction.  There’s no side seam at the very top between the waistband and pocket bottom.  I won’t attempt to explain it further, but it’s really clever and kept me guessing whilst putting them together.  Sometimes I like it when a seemingly “simple” pattern has an interesting twist because it makes the making process that little bit more exciting.
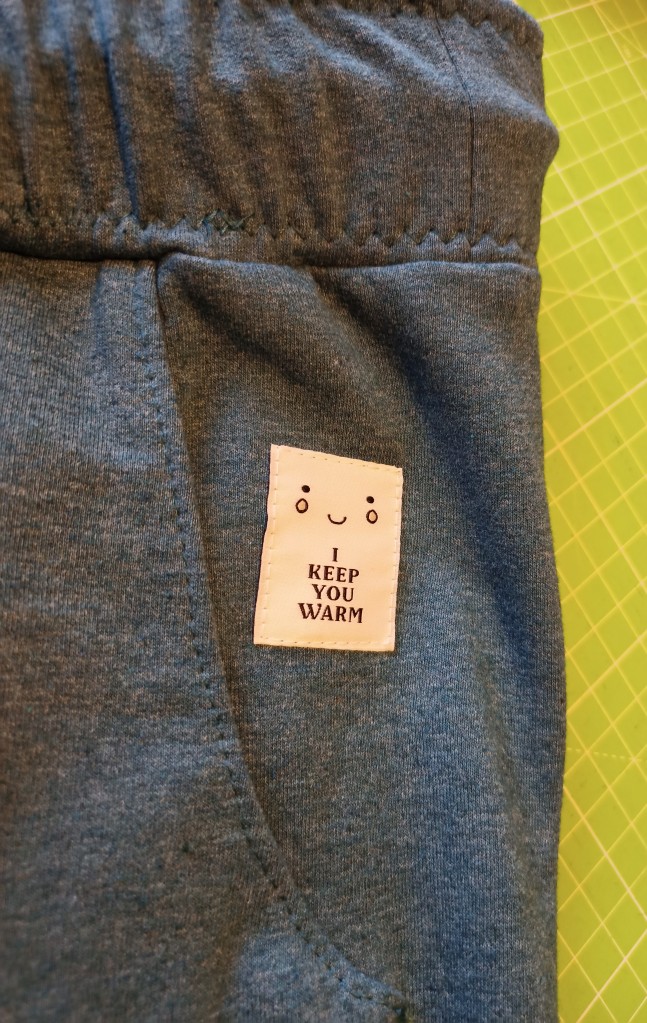
Do I have any other “bottoms”?

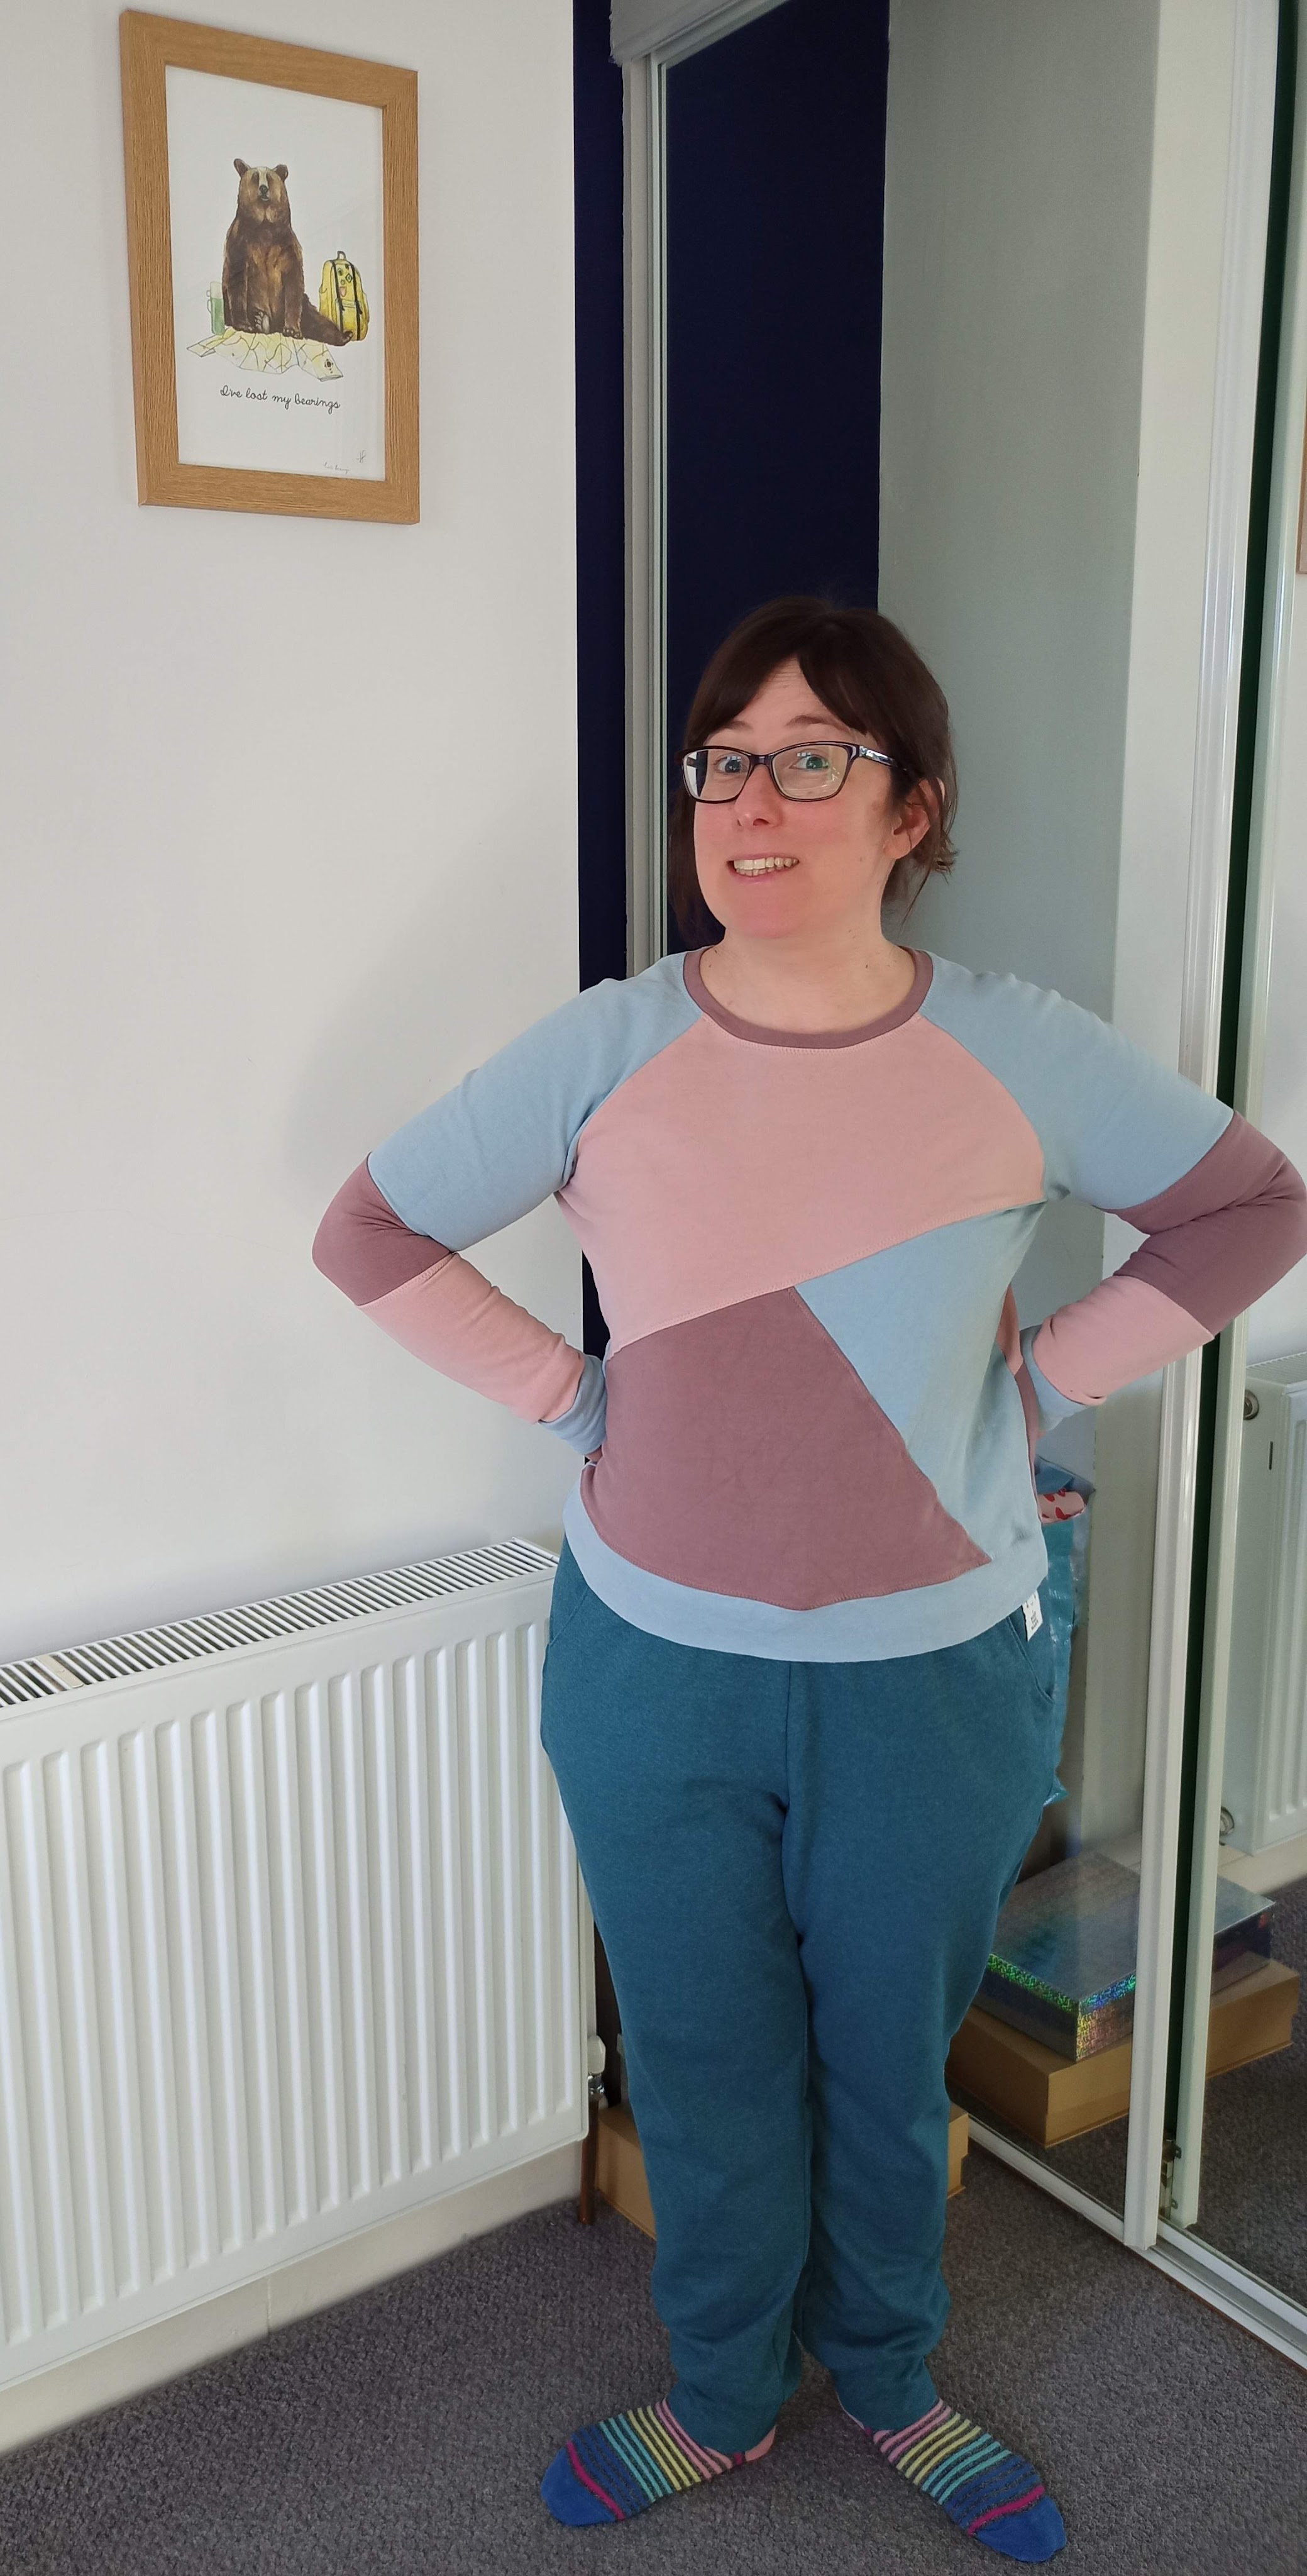
When I finished my Plateau joggers, I wore them fairly constantly for a number of days.  Other bottoms lay neglected in the wardrobe, wondering if they would ever be worn again.  Eventually, a trip to the office and the expectation to be ‘smart’ got me out of them. They have already been through the laundry a few times and are washing well. The fit is good, the pockets are generous and they definitely fulfil their purpose.

Whilst not the most exciting sew, we all need essentials in our wardrobe! Thanks for reading :o)
Sewing

Shorts weather

For anybody who missed it, the UK had some rather warm weather recently.  As a nation obsessed with weather at the best of times, I dread to think what the traffic on the Met Office website was like during mid-July.

A few weeks before the heatwave, I was researching shorts patterns for an upcoming holiday, having realised that I only had one pair of shorts.  I had pretty much decided on the True Bias Emerson pants when Guthrie & Ghani released a “sneak peak” of their July Sewing Society kit.  From the zoomed-in photo of the waistband, I was almost certain it was the Emersons.  I decided to wait until the release date because a ready-made kit would be easier to buy than sourcing everything separately.

I wasn’t disappointed and snapped up an Emerson kit within about 3mins of it being released!

The kit

The kits come with everything you need to make a garment – fabric, pattern, notions and a label.  The instructions aren’t printed which I find a little frustrating as I like a print out to scribble notes on.  I printed the instructions from the file whilst waiting for the kit to arrive.

The kit fabric is a navy ramie, which is derived from nettles.  It’s like a textured linen and is quite thick to work with, but feels lovely on.  The Guthrie Ghani website explains that ramie is breathable, durable and anti-bacterial.

As always, I pre-washed my fabric (I’m a good girl) and set upon making a toile whilst it was drying.  I added 2″ to the length of the shorts after reading a few reviews online that these were “short shorts”.  I’m 5’2″ and the additional few inches make the shorts land just above the knee, which is perfect for me.

My wearable toile is from viscose linen (the obsession continues) from Lamazi, and proved to be perfect fabric. I was happy with the fit so cut out the ramie quickly.

Going rogue

I changed the waistband construction on my second pair of shorts for a neater finish.  The instructions advise finishing all the seams together, which looks quite messy. My green pair look even messier because I went over twice with the overlocker due to a mishap with some topstitching!

For my navy pair, I pressed the seam allowance towards the wrong side and caught everything inside with some topstitching. This means there’s no visible hems on display, or scratching my back.

These shorts have seen Austria and been my “holiday uniform”. I’ve realised that I’m wearing a Sagebrush top in all of these photos. Other tops are available and can be worn with Emersons!

Thanks for reading. Stay cool :o)

Sewing

Gingham dreams

Following my last post, I’m back with a more seasonally-appropriate garment today. Continuing with the 90s theme (see my Ninni culottes), I fell in love with this reversible gingham double gauze. Memories of pink and blue gingham school summer dresses, and the joy of not having to wear a tie* for a few short months were conjured up when I opened this fabric parcel.

* Lots of people I speak to are surprised we had to wear a tie at a state-run primary school. To make things slightly easier, we were allowed to wear one with an elastic neckband when it was a PE day!

The fabric is an Atelier Brunette double gauze of the non-crinkly variety. It has small gingham squares on one side and slightly larger squares on the other. I picked up 2m in Sew Me Sunshine’s remnant sale, and added a full price metre to my basket. As soon as I saw the fabric, I wanted to use the ‘reversibility’ to create a tiered dress, alternating small and large gingham.

After some internal debate, I opted to use the Deer and Doe Myosotis dress as the base. Having made a full-length version last year, I get a lot of wear out of it and it received a lot of compliments during Me Made May, so I knew I would make use of one in this smokey gingham.

As well as the fit adjustments I made to previous versions, I also hacked the following elements:

  • Collar-less hack by StitchOdyssey
  • Maxi-length with three tiers
  • Waist ties

Gingham is both a blessing and a curse when it comes to cutting. The slightest nudge of the fabric meant it could be knocked out of line and need realigning. Whilst I’m usually quite careful about cutting on the grain, gingham made me realise there’s definite leeway with other fabrics. However, being able to count squares made things very easy when it came to eye-balling the tiers. I also have a new measurement – forget inches and centimetres, this hem was 4 “ginghams”!

As ever, the devil is in the detail and I chose some of my many tiny glass buttons from Swagman’s Daughter. The label is a testament to how long it took to cut this dress out!

As with my other maxi Myositis, this is so comfortable to wear. I did compare myself to a gingham road-sweeper but I’m fine with that! Thanks for reading :o)

Sewing

Maybe culottes don’t just belong in the 90s

Hello hello! It feels like it’s been a while since I have written. Today, I’m talking about my new favourite trousers. I have wanted to make some more trousers for a while but haven’t had the courage to tackle them. The Named Ninni Culottes are a fantastic pattern for novice pants sewists with their elastic waistband and generous ease. The style of culottes means there is limited fitting around the crotch, plus the pattern has pockets!

Back to the 90s?

I’ve steered clear of the culottes trend due to a deep-rooted fear of looking like I was back in the 90s in my Brownie uniform. After dispensing with the dress as a uniform, the powers that be decided short culottes (in the most hideous colour) were a suitable replacement.

I asked my parents to see if they had any photographic evidence of me in said uniform and, due to a fairly comprehensive labelling system, and some brutal cropping of a group photo, the archives have provided. Admittedly it’s a grainy photo but a quick internet search of “UK Brownie uniform 1990s” will provide more detail if you’re interested.

Early 90s fashion

However, the Ninni culottes have converted me! Are they pants, is it a skirt, who knows? More importantly, who cares, they’re comfy for the weekend and smart for the office.

This image has an empty alt attribute; its file name is screenshot_2022-05-07-17-24-40-23_965bbf4d18d205f782c6b8409c5773a4.jpg

Pattern details

The pattern recommends a light stretch fabric but also notes that there is enough ease to make from woven fabrics. My obligatory online research showed that a lot of people have made from woven fabric so I was confident the pattern would work.

I made a wearable toile out of some patterned crepe that I’ve had in my stash for years. I cut a size 40 which I knew was too big for my waist but I decided the elastic band would sort that out. This also meant that I didn’t have to grade (so lazy). For my toile, I took too much off the legs so corrected this on my final pattern pieces. In the end, I shortened the leg length by 2″.

For my post-toile version, I used a viscose linen (my love for this substrate continues) from Dragonfly Fabrics in the colourway ‘French Navy’. This colour blends well with most tops in my wardrobe, meaning these are bottoms that fit in immediately.

This image has an empty alt attribute; its file name is screenshot_2022-05-07-17-24-11-96_965bbf4d18d205f782c6b8409c5773a4.jpg

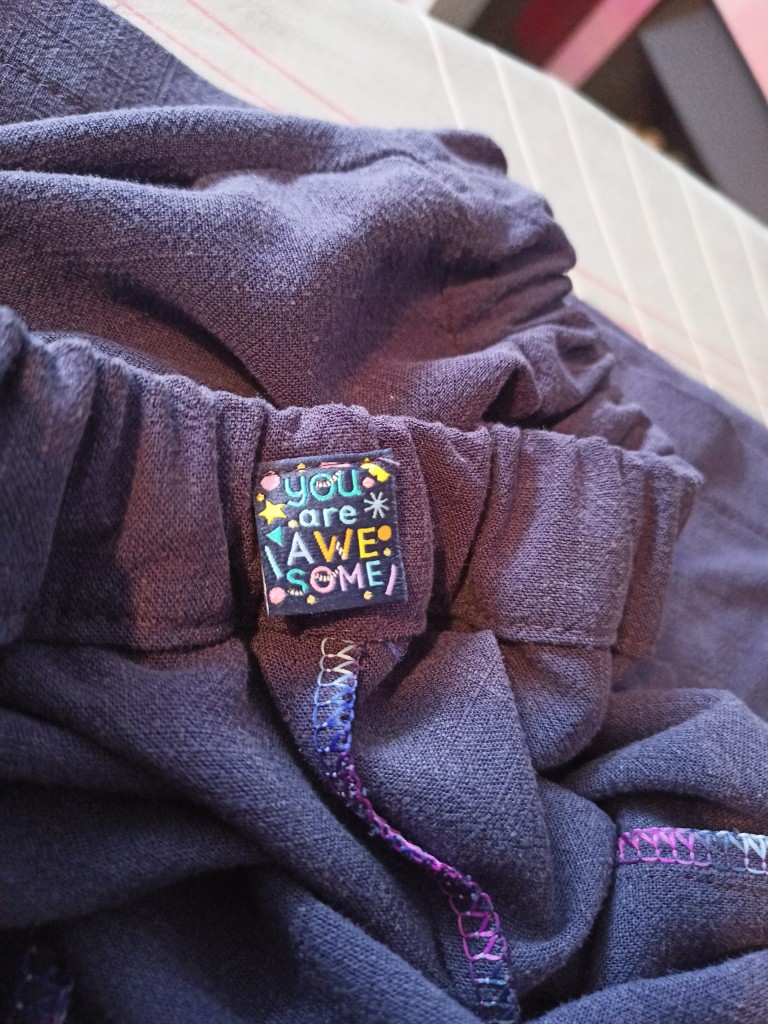
One of my proudest elements of this make was actually remembering to put the label in before constructing the waistband. As a result, I chose a ‘modest’ “You Are Awesome” label from my Kylie and the Machine advent calendar! You can also just make out the purple hues of the overlocking thread which make the insides pretty.

I definitely recommend a label in this pattern because my toile doesn’t have one and it’s quite difficult to determine which is the back (until I’ve put them on and realised something “doesn’t feel quite right”!).

This image has an empty alt attribute; its file name is img20220418101236.jpg

I wore my toile a few times to check I was comfortable with the fit. Once I had decided on leg length and modified the pieces slightly, the pattern came together really quickly on my second attempt.

I have worn both pairs a lot and I’m finding them to be a great spring/summer option for the months where it’s warm but not hot. My #memademay daily outfit photos have already featured the culottes a few times with different tops which is a good test of wearability.

This image has an empty alt attribute; its file name is img_20220514_112901.jpg

Now, I’m off to try and remember the names of all the Brownies that I cropped out of the original photo. Thanks for reading :o)

Sewing

False button plackets

Here in the UK, we’ve been clinging on to the remnants of summer. It’s been lovely and given me a chance to wear my summer clothes for a bit longer before wrapping myself in layers upon layers of wool, fleece and thermals.

I have two final summer makes to talk about today, both are long-admired patterns that I finally got around to making this year. In writing this post, I also realised that both of these garments have “button cheats” as features, which ties them together quite neatly.

The patterns

The Tilly and the Buttons Mathilde blouse is one of their older patterns which, I believe, made an appearance on the first series of Great British Sewing Bee. I love the billowy sleeves and loose fit, along with the other details that I’ll talk about later.

The bottom half of this outfit is Sew Liberated’s Estuary skirt. The pockets originally caught my eye but I had a similar gathered skirt pattern so thought it wasn’t worth duplication in my pattern stash. Then I found out that the back waistband is elasticated and the button placket can be made “false”…therefore no buttonhole drama. Game changer!!

It’s all in the detail

I have used a lot of TATB patterns and so have a good idea of how their block fits me. As this blouse is intended to be loose, I didn’t worry about grading between sizes as I would with a more fitted top. I cut a size 5 all over, then shortened the bodice and sleeve pieces each by 2″.

I made a wearable toile from a cotton maxi dress that I haven’t worn in years, but loved the fabric so much I put it in my stash. The cotton holds the pin tucks really well and helps the sleeves show off their shape.

Maxi dress refashioning

My toile fit well and I wore it a few times before cutting into my main fabric to be sure it didn’t need any modifications.

For my final version, I used some vibrant pink viscose from Lamazi Fabrics. It’s brighter than I would usually wear but I actually love it! Whilst the topic of this blog post is summer outfits, I will definitely wear both tops in the autumn thanks to the 3/4 sleeve length.

Pin tucks, billowy sleeves and surprise buttons on the back. The Mathilde has got all of these gorgeous features. I had never sewn pin tucks before but TATB’s trademark excellent instructions walked me through it with ease.

The button band at the back actually only has one buttonhole at the top. I pinned the back to see if I could get it over my head easily with just one button and I could. The pattern instructions tell you how to sew the placket together, boxing it in, so it’s “Tilly approved”. However, for my pink top, the viscose kept shifting so I ended up just sewing through all layers of the fabric when attaching the buttons.

As the button band is on the back, I chose flat buttons so that they don’t dig in when I’m leaning against something. My love affair with Swagman’s Daughter continues with these beauties.

The Mathilde is proving to be a great top to wear during work and play time. If I was to make again (likely), I would like to add a line of piping between the yoke and main bodice. I think that will help highlight the pin tucks as they are lost in a busy pattern and take the longest to do.

Lilac and clumsy can be dangerous

When I spotted this lilac viscose linen on Rainbow Fabrics, I confess that I wasn’t sure. I’m a “spiller” and, right in cute, the first time I wore this skirt, I slopped pizza sauce down it (Vanish to the rescue!). That said, I do love the colour and glad I took the ‘risk’.

As with the Mathilde, the Estuary skirt can be made with a false button band at the front, largely made possible by the elasticated back waistband. I love this construction because a flat fronted waistband means that there isn’t the added bulk that comes with a full gathered skirt but there’s some “give” in the skirt for those days when I’m feeling a little more bloated. Not forgetting the absence of needing to sew 9 buttonholes!

Buttons from Swagman’s Daughter
(sensing a theme)

There was a lovely detail that I missed in constructing this skirt. As somebody who has been sewing for a while now, I merrily put the skirt together paying little attention to the pattern until I got to the waistband. The pattern gives instructions for flat-felled seams which would have looked lovely on this plain fabric but there was no way I was unpicking it. A good lesson in reading the pattern through before starting.

In terms of fitting, I cut 2″ off the length (I’m 5’2″ for reference) but otherwise made a straight 12. The beauty of elastic is that (within reason) there’s wriggle room in fitting up to quite late in the sewing process.

The pockets that I lusted over for so many years do not disappoint with their unusual shape. They’re the perfect size for a ball of wool for al fresco knitting!

Thanks for reading :o) If anybody needs me, I’ll be unpacking my thermals in anticipation of the coming months.

Look at that sleeve!
Sewing

How much is “too much”?

Hello all! This blog post started as a Lotta blog, then I realised I had two other double-gauze items either cut out or queued up. Musing on my queue, I began to wonder…

How much double-gauze is “too much”?

A lot of sewists say that they struggle with double-gauze – some can’t get the tension and/or needles right, some say that it generally misbehaves for them. Personally, I’ve never had any problems and love sewing with, and wearing, double-gauze. In particularly, crinkly double-gauze – the joy of not having to press a length of fabric after its pre-wash, or iron the eventual garment every time it comes out of the washer is enough to keep me happy!

As well as low maintenance, I find double-gauze lovely to wear in both hot and cooler weather. In short, I’m a fan.

How it all began

The two types of ‘DG’ that I’ve used are “crinkly” and “non-crinkly” which probably aren’t the technical terms! For proper explanations, I recommend this Tilly and the Buttons blog post.

In preparation for my blog, I cast my mind back and thought I’d identified my first double-gauze garment. In actual fact but, I identified my fifth then kept thinking of earlier makes!

My first make in ‘DG’ turned out to be a “non crinkly” Nina Lee Fleet top in Nani Iro fabric, and I subsequently made another with an added sleeve ruffle.

Nani Iro is fantastic for simple tops as the designs are so beautiful that they can shine. I’ve worn these Fleet tops so many times with shorts and skirts since I made them and they’re wearing and washing really well.

On the crinkly side of things, I was introduced to this type by a Sew Hayley Jane subscription box. I received a light blue crinkly ‘DG’ with dandelions on it, which I made into my first Myosotis dress and wear all the time in the summer. A bright teal with gold dots Myosotis quickly followed as it’s a great fabric to pair with this pattern.

The beginning of full appreciation

On reflection, I think my coral Sagebrush top was probably the beginning of my full appreciation for the crinkly stuff. The statement sleeve looks very different in double gauze to a drapey viscose. My shadow looks like an American footballer in full kit because of the way the fabric holds its own weight! My only complaint about a ‘DG’ Sagebrush is that it’s a bit of a nightmare to get a cardigan over the sleeves – it’s a top for guaranteed sunny days, or to pair with the I Am Lion jumper.

Continuing my love affair with the crinkly stuff

Now we (finally) come to the original reason for this blog – a Tilly and the Buttons Lotta dress. During MeMadeMay2021, I realised that I was lacking in summer dresses that are comfortable to sit in all day whilst working. The versatile Lotta, which I’ve previously made in jersey, can also be made in woven fabric.

With the loose bodice and A-line skirt, this is the perfect dress for sitting in all day.

This mauve fabric was from Bugweeds, which is a relatively new ‘bricks and mortar’ shop in York. I found this a refreshingly quick sew. Simple pattern pieces, plain fabric, no notions (except for a bit of elastic) and TATB’s great instructions meant I whipped this dress up in a few leisurely evenings. A “palate cleanser” after a few more involved makes.

As my previous dress was in jersey, I checked the final garment measurements to make sure I hadn’t sized down to account for the stretch. In the end, I used the same pattern pieces.

Double ruffle on double gauze

And finally, I bought this dark teal from The Sewist Fabric Shop with a voucher that I received as payment for a blog post.

I added a double ruffle with a remnant of one of my favourite fabrics and also put an elastic channel a few inches up from the bottom of the sleeve to create a different silhouette.

I’m really pleased with the hacks which have added a bit of personalisation to a favourite pattern of mine.

Thanks for reading. Full disclosure, there’s another ‘DG’ garment in my queue! :o)

Sewing

Christmas Day Fleetwood

Greetings! Today I’m taking you back to Christmas Day 2020, which feels like months ago. For as long as I can remember, I’ve enjoyed ‘dressing up’ on Christmas Day. Even on a beach in New Zealand I wore a sundress. With all of the uncertainty surrounding Christmas 2020, I committed to making myself a new frock and wearing it come-what-may.

2020 summed up – slippers and an office chair constantly in the background

Splash of colour

I bought this amazing “Amarchi Art” cotton lawn from Sister Mintaka and love it so much. It’s so colourful and changes in different light. I’ve kept all scraps bigger than 2″ square because I didn’t want to part with them.

Cotton lawn is always a dream to sew with because it’s so well behaved. It does require precise cutting and notching though as there is little ‘give’ when stitching it together.

Fleetwood

I bought the Fleetwood Dress within the first week of its release. I had seen teasers of it on French Navy’s Instagram and really liked the look of it. My original plan was to use another fabric but I decided I didn’t have enough to make Version A. I decided this would be a great dress for Christmas Day as well because it’s very “forgiving” around the waistline ;o)

I had read a few pattern reviews that suggested a wide bicep adjustment so I did that before cutting a toile. I ended up doing a second, wider bicep adjustment and re-toiling the sleeve as it was still too tight. Other than that, I didn’t really alter the pattern to fit my frame.

Overall my fitting/alterations were as follows:

  • Version A. I cut the bodice at Size C, then the whole skirt at Size D (didn’t grade as it’s a rectangle)
  • Wide bicep adjustment (twice)
  • Added in-seam pockets using another pattern’s pocket piece
  • Didn’t do buttons all the way to the top as I didn’t think I would wear it fully buttoned
  • Shortened sleeve by 1.5″ – this was an error and the 1.5″ is going back on for my next version! More on that later.

The only additional alternation I intend to make in future versions is to lower the neckline by an inch and level the curve. If the dress was done up to the top, it would be too high up/tight on my neck. Even without buttons to the top, the opening was ‘tickling’ my chin so I ended up creating a faux V neck, which I like the look of and was more comfortable wearing. I was too pre-occupied with the bicep fitting to notice this on my toile – lesson learned!

Equal and opposite reaction?

Physics was my nemesis during A Levels and, whilst not quite Newton’s Third Law, the shortening of these sleeves reminded me what a torment “equal and opposite reactions” were during exam time. I decided to shorten the sleeve by 1.5″ but didn’t account for the impact that would have on the cuff’s ability to fasten.

I was so happy with how the cuffs went in that I didn’t want to try and rectify it so a “design feature” was born. In theory, I think I could have unpicked the pleat, created two longer cuffs and dealt with it but I wasn’t irked enough with my error to bother. Style-wise, I flip the cuff up and think it looks fine and is comfy to wear. Plus, two less buttonholes and buttons to sew!

Hexagon buttons

My final comments are about buttons – hurrah! I’ve written of my love for The Swagman’s Daughter before and it will continue for a long time. These little green hexagons are so cute and perfect for this dress. They highlight what is, I think, my first button placket very nicely too.

Pockets!

Also, it has pockets! Thanks for reading :o)

Sewing

Layered Lotta

Welcome back! After my coat expedition, I wanted a simple sew that didn’t require much thinking. Enter Tilly and the Buttons’ new dress, Lotta. I bought this pattern fairly soon after its release. The versatility really appealed as it can be made with wovens or knits and has two sleeve options, and two lengths of skirt. It’s basically got all the seasons covered! Plus, as Tilly says on her site, there are “no fiddly bits” so I knew it would be a satisfyingly quick make for me.

Working from a fridge

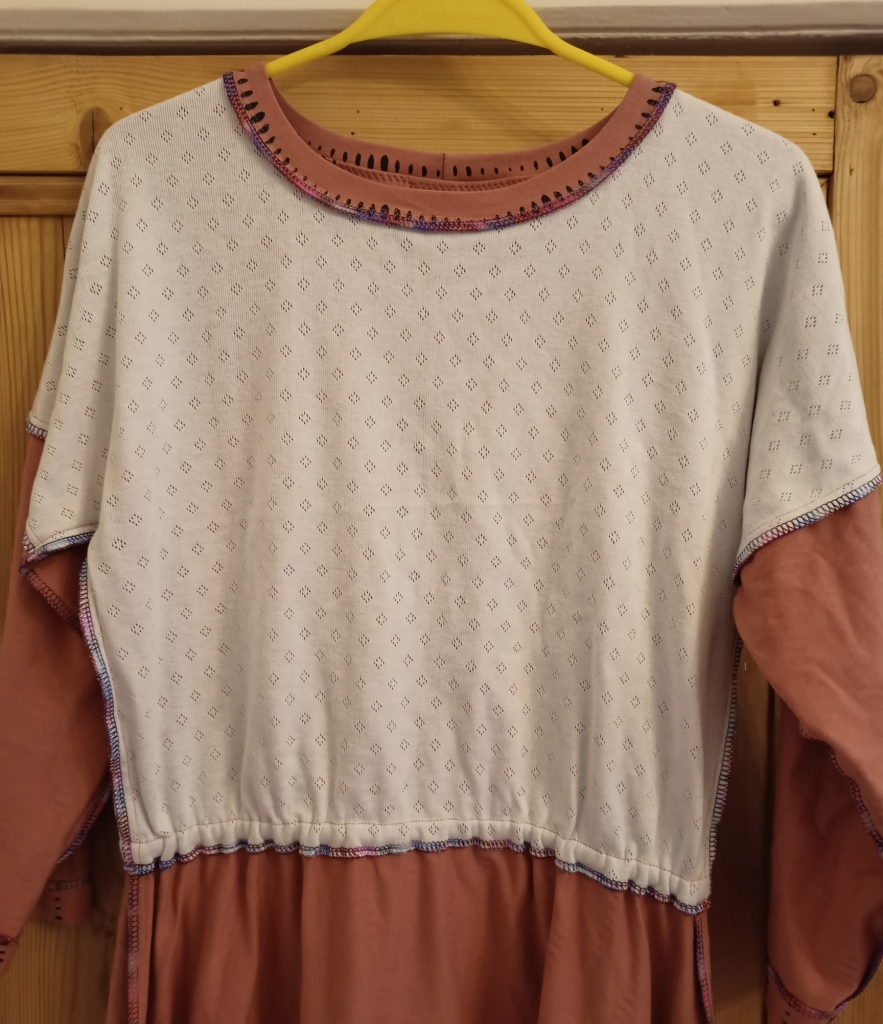
Since the season changed in the UK, I’ve noticed that my work set-up (i.e. dining room) is quite chilly. I think it’s something to do with the lack of 1000 people and computers in the same building! Even with the heating on, it can feel a bit nippy. A while ago, the genius sewing queen, Elisalex ,posted on Instagram that she had lined a dress with some pointelle. It basically gives a thermal-style lining to a garment. I thought this was possibly the best idea ever to have been formed. I bought some pointelle with the idea of replicating this on one of my makes.

I wanted to make a jersey Lotta, but also decided this was the garment to test the pointelle layer on. The Lotta has grown-on short sleeves so I decided it was a good pattern to try because there wouldn’t be too much bulk directly under my arms.

Adjustments

The TATB block fits me really well and I rarely have to make many alterations. For my Lotta, I…..

  • Cut a size 4 all over. Sometimes I would cut a 5 at the hip but there is a generous amount of ease in this pattern
  • Shortened skirt by 2″
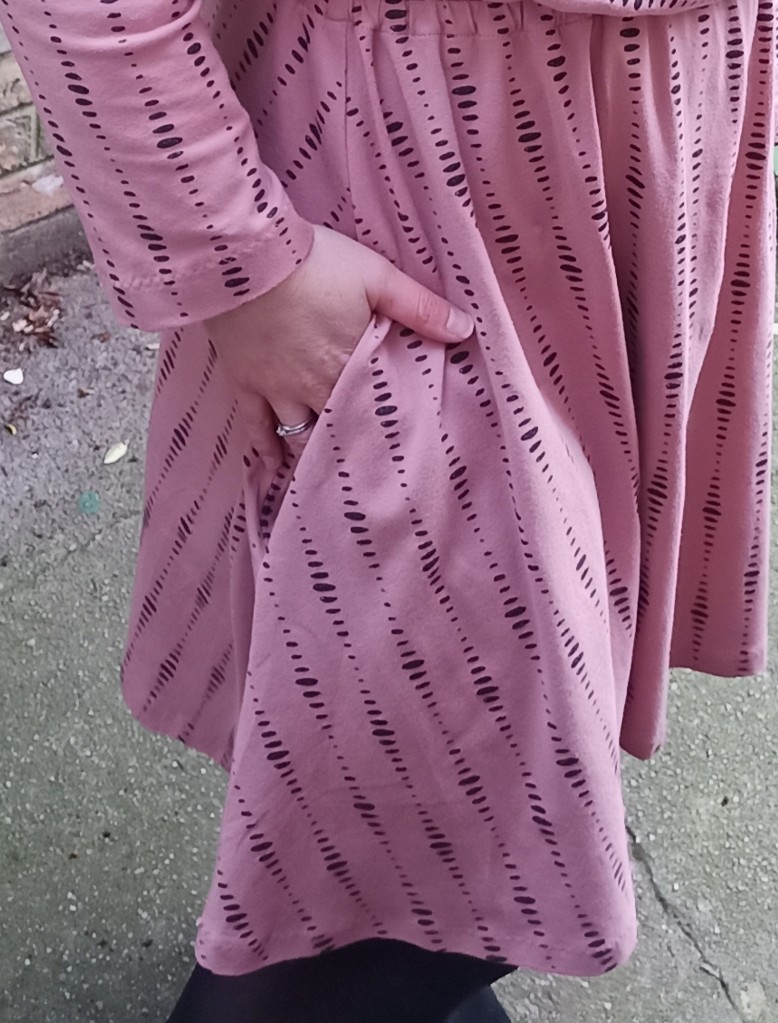
  • Added in-seam pockets (which are a bit too low!)
  • Added a secret thermal layer

I also played around with the sleeve length. The long sleeve add-on is designed as ‘bracelet-length’ but I’m not a big fan – it just feels a bit “half mast” to me! Is it 3/4 length, is it full length, who knows? As I’ve got short arms, I used the original pattern pieces thinking the length would probably be about right for full length on me. In fact, I still had to take a bit off as they were too long! I cheated slightly and doubled the hem allowance (3cm instead of 1.5cm), which worked well.

Adding the thermal layer

I only added the pointelle layer to the bodice. To do this, I cut the bodice pieces in my main fabric and the pointelle. I added a strip of stabiliser to the back bodice shoulders of the main fabric.

To make sure the pieces stayed together, I basted both front bodices wrong side together along the shoulders and neckline. Then I repeated this with the back bodice pieces.

After that, I treated each as a single piece of fabric. If I was to do this again, which is highly likely, I would probably baste around the entire outside of the main and lining pieces to keep them together.

Secret pjs

My main fabric was from Pin and Sew, who were having a closing down sale. It’s a cotton jersey and the black dots have a hint of sparkle in them. To make things interesting, and not have to worry about pattern matching, I rotated the bodice pieces 90deg so the ‘stripes’ are horizontal. I had fun playing with the design of this, cutting out tiny pattern pieces and seeing which I liked best.

This was probably more fun than it should have been – simple things….!

The fabric is so cosy and embodies the phrase “secret pjs”. I wore the dress the day after finishing it and was so comfortable, and warm! I’m already plotting a summer version, maybe in double gauze with patch pockets and short sleeves.

Thanks for reading :o)